The ATMEA1 reactor
-
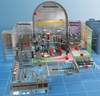
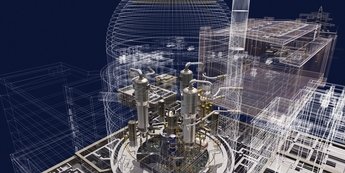
Figure 2: 3D representation of ATMEA1 reactor -

Figure 2 -
Figure 1: ATMEA1 primary system configuration -
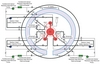
Figure 3: General arrangement of the main ATMEA1 safety systems -

Figure 1 -

Figure 3

